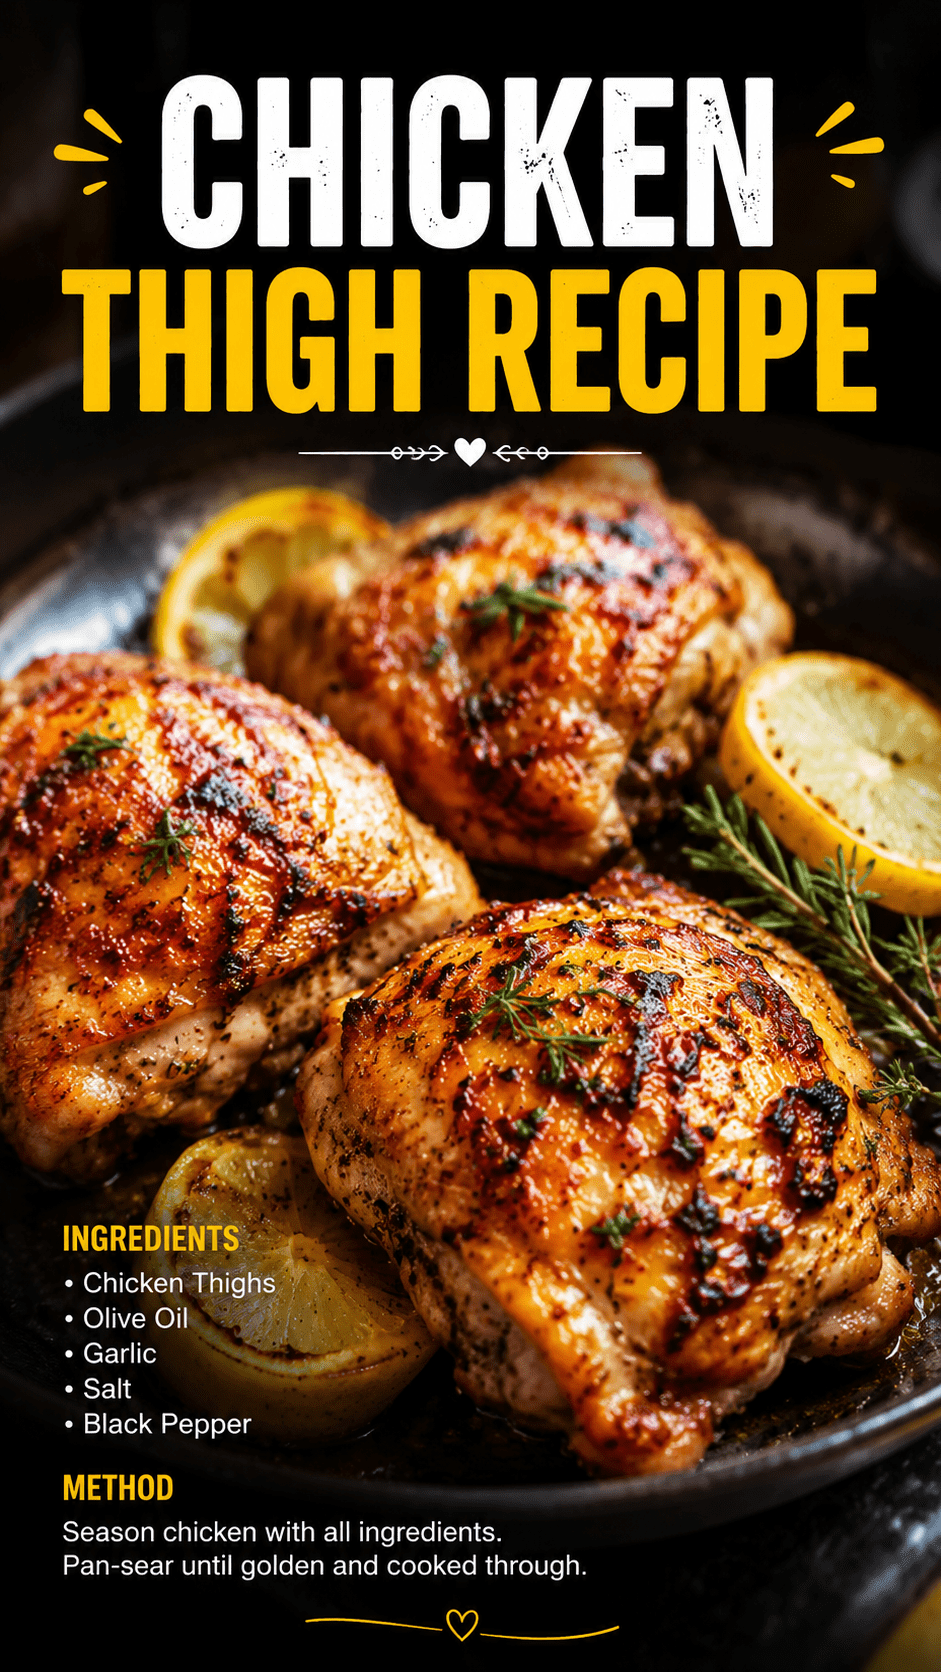
You know that dinner where you take the first bite and immediately think, “okay, I need to make this every week?” This is that recipe.
Crispy garlic butter chicken thighs. Golden, crackly skin. Juicy meat underneath. A pan sauce so good you’ll want to pour it over literally everything on the plate.
And here’s the thing: it takes about 35 minutes start to finish.
I know people say that about recipes all the time and it’s almost never true. This one actually is.
Why Chicken Thighs (and Not Breasts)
Chicken breasts get all the attention, but thighs are where the real flavor lives.
Thighs have more fat content, which means they stay juicy even if you slightly overcook them. They’re also significantly cheaper per pound, which I always appreciate.
The skin on bone-in thighs crisps up in a way that’s honestly a little show-stopping. Once you see how that skin looks coming out of the pan, it’ll make sense why this cut has such a loyal fan base.
What You’ll Need
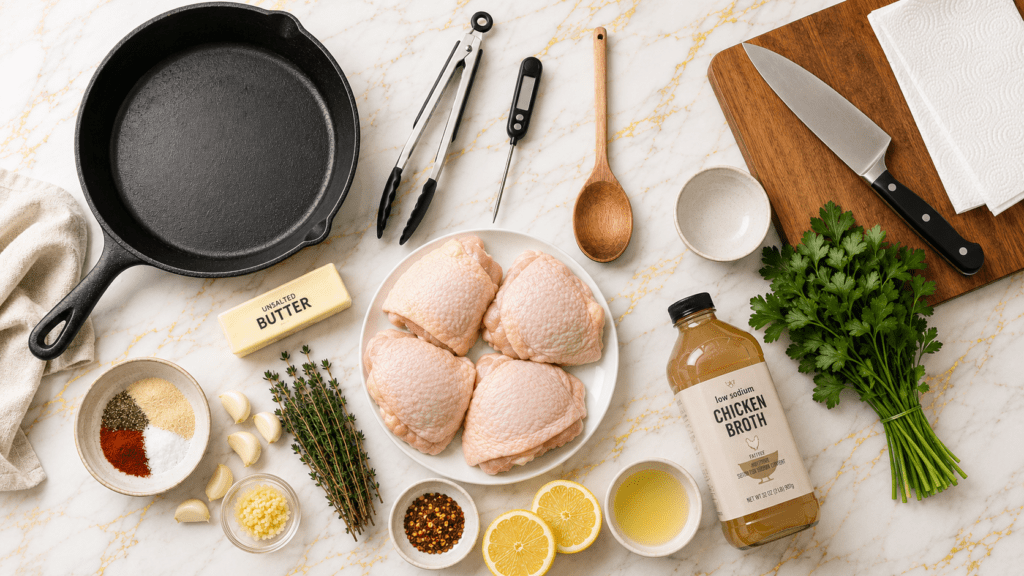
For the Chicken
- 4 bone-in, skin-on chicken thighs (about 2 lbs total)
- 1 teaspoon kosher salt
- 1/2 teaspoon black pepper
- 1/2 teaspoon smoked paprika
- 1/2 teaspoon garlic powder
- 1/4 teaspoon onion powder
For the Garlic Butter Pan Sauce
- 4 tablespoons unsalted butter
- 6 cloves garlic, minced
- 1 teaspoon fresh thyme leaves (or 1/2 tsp dried)
- 1/2 teaspoon red pepper flakes (optional, but recommended)
- 1/2 cup low-sodium chicken broth
- 1 tablespoon fresh lemon juice
- 1 tablespoon fresh parsley, chopped (for garnish)
Tools You’ll Need
- 12-inch oven-safe skillet (cast iron is ideal here)
- Meat thermometer
- Tongs
- Cutting board
- Sharp knife
- Paper towels
- Small bowl (for mixing the spice rub)
Pro Tips
These are the things that actually make a difference when you’re making this for the first time.
- Dry the skin completely before seasoning. Pat the chicken thighs with paper towels until there’s no visible moisture. Wet skin = steamed skin, and steamed skin does not get crispy. This one step changes everything.
- Start skin-side down in a cold or barely warm pan. Most people throw chicken into a screaming hot pan. For thighs, starting at medium heat and letting the fat render out slowly gives you much better results. The skin will release naturally once it’s ready to flip.
- Don’t move the chicken. Once you put it down, leave it. Resist the urge. Every time you lift it too soon, you’re pulling the skin away from the pan before the crust forms.
- Use a thermometer. The target internal temperature is 165°F (74°C), but chicken thighs are honestly still great at 170-175°F because of the fat content. A thermometer takes all the guesswork out.
- Let it rest. Pull the chicken off the heat and let it sit for 5 minutes before serving. The juices redistribute and every bite is better for it.
How to Make Crispy Garlic Butter Chicken Thighs
Step 1: Season the Chicken
Mix the salt, pepper, smoked paprika, garlic powder, and onion powder in a small bowl.
Pat the chicken thighs completely dry with paper towels. Season all over, including under the skin if you can loosen it slightly with your fingers.
Let the seasoned chicken sit at room temperature for 15-20 minutes if you have time. Cold chicken straight from the fridge hits the pan unevenly.
Step 2: Sear the Chicken
Place your oven-safe skillet over medium heat. No oil needed; the chicken skin has enough fat to self-baste.
Place the thighs skin-side down. You’ll hear a gentle sizzle. Good sign.
Cook for 12-15 minutes without touching them. The skin will go from pale to deep golden brown. Flip once the skin releases easily from the pan.
Cook on the other side for another 5-7 minutes, or until the internal temperature reads 165°F.
Transfer the chicken to a plate and loosely tent with foil.
Step 3: Make the Garlic Butter Sauce
In the same pan (don’t you dare wash it — all those browned bits are flavor), reduce the heat to medium-low.
Add the butter. Once it melts, add the minced garlic and red pepper flakes. Cook for about 60 seconds, stirring constantly. The garlic should smell incredible but not turn brown.
Pour in the chicken broth and lemon juice. Scrape up any browned bits from the bottom of the pan with a wooden spoon. Let it simmer for 2-3 minutes until slightly reduced.
Add the thyme and stir to combine.
Step 4: Finish and Serve
Nestle the chicken thighs back into the pan, skin-side up. Spoon the sauce over the meat (but try to keep the skin dry if you want it to stay crispy).
Garnish with fresh parsley and serve immediately.
Substitutions and Variations
The recipe is great as-is, but here’s how to make it yours:
| Swap | Use Instead |
|---|---|
| Fresh thyme | Rosemary, oregano, or sage |
| Chicken broth | White wine (same amount) |
| Unsalted butter | Ghee or olive oil |
| Red pepper flakes | A pinch of cayenne |
| Bone-in thighs | Boneless thighs (reduce cook time by 5-6 min) |
For a dairy-free version: Replace the butter with a good olive oil or dairy-free butter substitute. The sauce won’t be quite as rich, but it’s still delicious.
For a keto version: This recipe is already keto-friendly. Skip the broth and just use more butter and a splash of lemon juice for the sauce.
Make Ahead Tips
You can season the chicken up to 24 hours in advance and store it uncovered in the fridge. The dry brine actually pulls a little moisture to the surface and then reabsorbs it, which seasons the meat more deeply and helps the skin get even crispier.
The garlic butter sauce can also be made separately and reheated gently before serving.
Nutritional Breakdown
Per serving (1 chicken thigh with sauce), approximate:
| Nutrient | Amount |
|---|---|
| Calories | ~420 kcal |
| Protein | 28g |
| Fat | 32g |
| Saturated Fat | 12g |
| Carbohydrates | 3g |
| Sodium | 520mg |
Chicken thighs are a solid source of protein, niacin, selenium, and phosphorus. The dark meat also has more iron and zinc than white meat, which often surprises people.
What to Serve With It
This dish is fairly rich, so sides that balance it out work best:
- Steamed or roasted green beans (simple, clean, cuts through the butter)
- Garlic mashed potatoes (if you want to fully commit to the comfort food night)
- Cauliflower rice (lighter option that soaks up the sauce beautifully)
- Simple arugula salad with lemon vinaigrette
- Crusty bread for mopping up every last drop of that pan sauce
Leftovers and Storage
Store leftover chicken in an airtight container in the fridge for up to 4 days.
To reheat without destroying the crispy skin, use a skillet over medium heat rather than the microwave. Give it 3-4 minutes skin-side down and the skin comes back surprisingly well.
You can also shred leftover chicken and use it in tacos, grain bowls, or pasta. The garlic butter flavor holds up really well in other dishes.
Freezer: Freeze for up to 3 months. Thaw overnight in the fridge before reheating.
FAQ
Can I use boneless, skinless chicken thighs? You can, but you’ll miss out on the crispy skin which is honestly the highlight of this recipe. If you go boneless, reduce the pan sear time by about 5-6 minutes per side.
My skin isn’t getting crispy. What went wrong? A few things could be happening: the chicken wasn’t dry enough before it hit the pan, the heat was too high (which steams rather than renders), or you moved it around too much. Also make sure you’re not using a pan that’s too small — crowded chicken traps steam.
Can I make this in the oven instead? Start it on the stovetop to get the skin crispy, then finish in a 400°F (200°C) oven for 15-20 minutes if your thighs are particularly thick. Going straight to the oven without searing won’t give you the same golden crust.
Can I double the recipe? Yes, but you’ll need a larger pan or two pans. Overcrowding is the enemy of crispy skin — leave space between each piece.
Is this recipe gluten-free? Yes. All the ingredients are naturally gluten-free. Just double-check your chicken broth label to be safe.
What if I don’t have a cast iron skillet? Any oven-safe heavy-bottomed skillet works. Stainless steel is a great alternative. Non-stick pans won’t give you the same sear and won’t handle oven temperatures as well.
Wrapping Up
This is one of those recipes you’ll have in your back pocket forever.
It’s the kind of dinner that feels special enough for a Saturday night but easy enough for a Tuesday when you’ve had a long day and just want something really good to eat.
The crispy skin, the garlicky butter sauce, the juicy meat underneath — it all comes together in a way that’s honestly a little hard to describe until you’ve tried it.
Give it a go this week and come back and tell me how it turned out. Did you add any variations? Did your family immediately ask for it again? Drop a comment below — I read every single one and would love to hear about it. 🍋