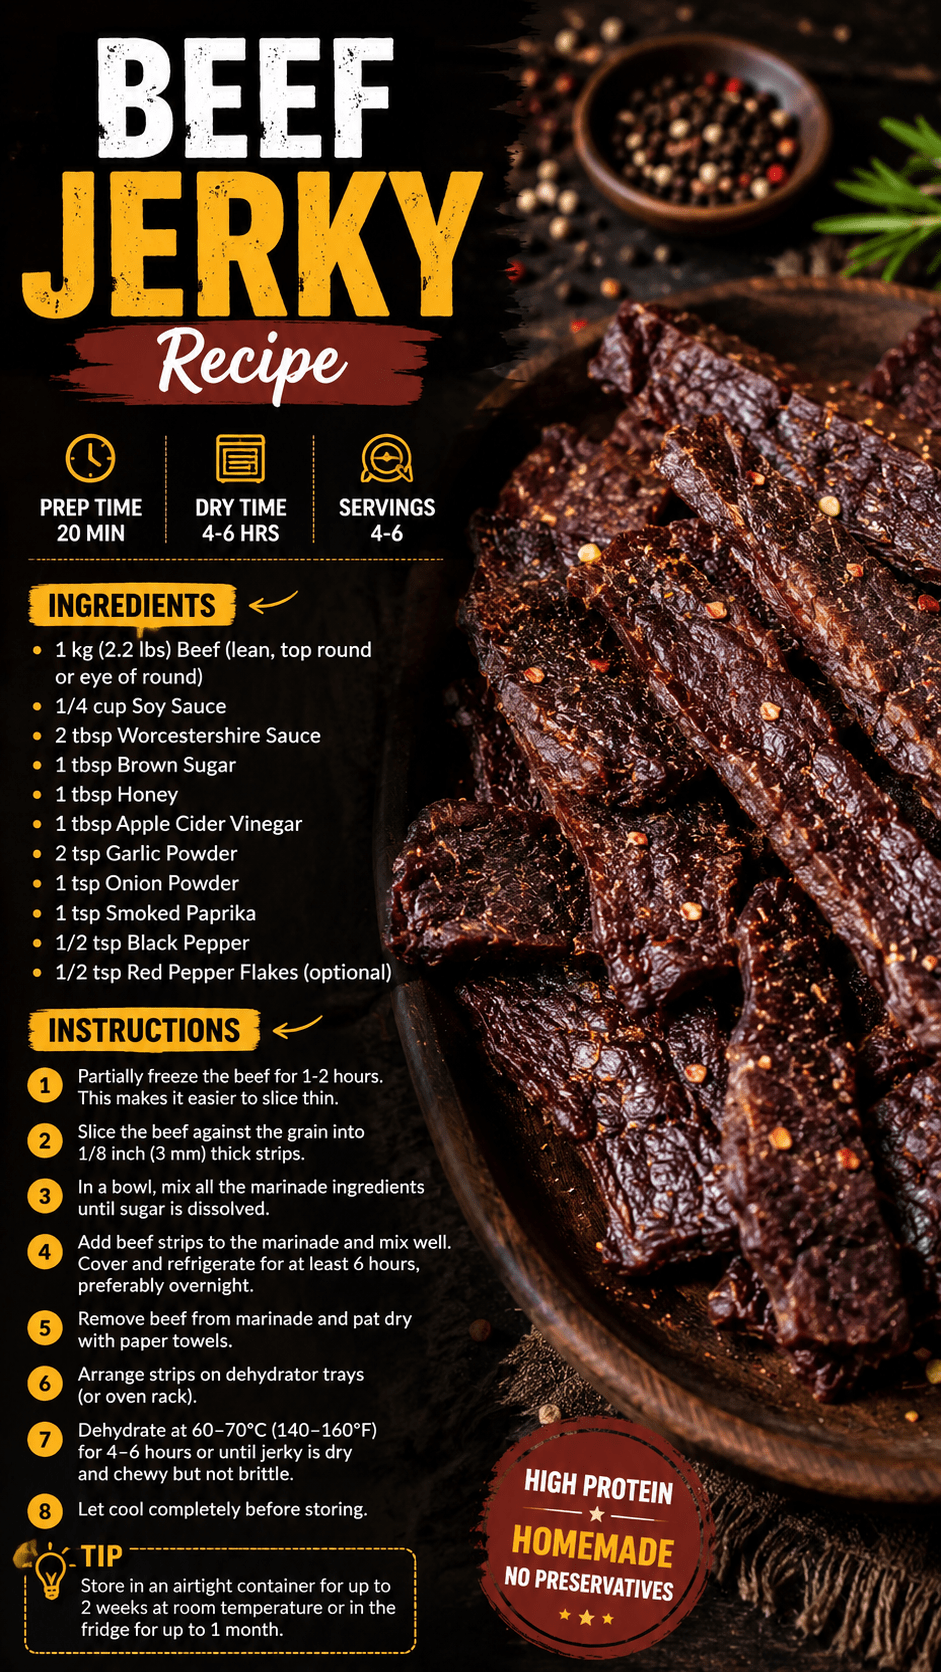
You spend $10 on a tiny bag of beef jerky, tear it open, and it’s gone in five minutes flat.
That’s been me, embarrassingly many times.
And then I made my own at home, and I genuinely couldn’t believe how much better it was. Thicker cuts, bolder flavor, and none of those weird ingredients you can’t pronounce on the back of a store bag.
If you’ve been convinced that making jerky at home is complicated or requires some kind of specialty equipment, I promise you — it’s really not. You probably already have everything you need.
(And yes, there is a little waiting involved. But trust me, it’s so worth it.)
What You’ll Need
For the Meat
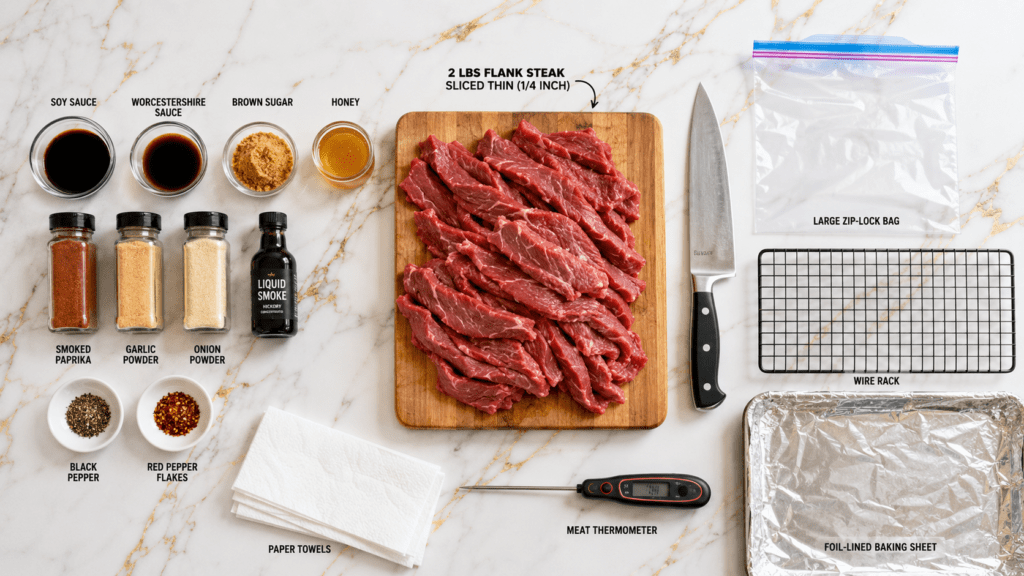
- 2 lbs flank steak (or top round, sirloin tip), sliced into 1/4-inch strips
For the Marinade
- 1/3 cup soy sauce
- 1/3 cup Worcestershire sauce
- 2 tablespoons brown sugar
- 1 tablespoon honey
- 1 teaspoon smoked paprika
- 1 teaspoon garlic powder
- 1 teaspoon onion powder
- 1/2 teaspoon black pepper
- 1/2 teaspoon red pepper flakes (optional, for heat)
- 1/2 teaspoon liquid smoke (optional, but really good)
Tools You’ll Need
- Sharp chef’s knife or slicing knife
- Cutting board
- Large zip-lock bag or glass mixing bowl (for marinating)
- Oven or food dehydrator
- Wire rack + baking sheet (for oven method)
- Meat thermometer
- Paper towels
Pro Tips
These are the things I wish someone had told me before I made my first batch.
1. Freeze the meat first — partially. Pop your steak in the freezer for about 1-2 hours before slicing. It firms up just enough to get those clean, even slices without the meat sliding around on you. Game changer.
2. Slice with the grain for chewier jerky, against the grain for tender. Most commercial jerky is sliced with the grain, giving it that classic pull-apart chew. If you prefer softer jerky, go against it. Both are good, it just depends on your preference.
3. Don’t rush the marinade. A minimum of 6 hours works, but overnight is where the magic really happens. The longer it sits, the deeper the flavor goes into the meat. Patience pays off here.
4. Pat the strips dry before cooking. This is the step most people skip, and it makes such a difference. Excess marinade on the surface will steam the meat instead of drying it. Blot those strips well before they go in the oven.
5. Low and slow is the only way. Cranking up the temperature to speed things up is going to give you cooked meat, not jerky. Keep it low (around 160-175°F / 70-80°C) and give it the full drying time.
Substitutions and Variations
Meat options:
- Top round — great budget-friendly option, very lean
- Eye of round — another lean cut, works really well
- Chicken breast — yes, you can make chicken jerky! Slice thin and reduce drying time
- Turkey breast — lighter flavor, still delicious
Flavor variations:
| Variation | What to Swap |
|---|---|
| Teriyaki | Add 2 tbsp rice vinegar + 1 tbsp sesame oil, skip liquid smoke |
| Spicy Korean | Add 1 tbsp gochujang + 1 tsp sesame seeds |
| Sweet & Smoky BBQ | Add 2 tbsp BBQ sauce + extra brown sugar |
| Classic Peppered | Go heavy on the black pepper, skip the sugar |
Soy-free option: Coconut aminos work as a 1:1 swap for soy sauce. The flavor is slightly sweeter but still great.
Make-Ahead Tips
The marinade itself can be mixed and stored in the fridge for up to 5 days before you use it.
If you want to batch prep, you can slice and marinate multiple pounds at once and either:
- Dry them all at the same time (using multiple racks)
- Keep extra marinating strips in the fridge for up to 48 hours before drying
Finished jerky also keeps surprisingly well — more on that below.
Nutrition Breakdown (Per 1 oz Serving, Approximate)
| Nutrient | Amount |
|---|---|
| Calories | 70-80 kcal |
| Protein | 10-12g |
| Fat | 1-2g |
| Carbohydrates | 3-4g |
| Sodium | 280-350mg |
High protein, low fat — one of the best on-the-go snacks out there, especially compared to what’s in most store-bought bags.
Dietary notes:
- Gluten-free: Use tamari instead of soy sauce, and ensure Worcestershire is GF-certified
- Low sugar: Cut the brown sugar and honey, add a tiny splash of apple cider vinegar for balance
- Paleo/Whole30: Use coconut aminos, skip Worcestershire (or use a compliant version), skip the sugar
Pairs well with: Long hikes, road trips, a cold beer, charcuterie boards, or honestly just standing in your kitchen sneaking bites as soon as it’s done.
How to Make Homemade Beef Jerky
Step 1: Prep Your Meat
Trim any visible fat from your steak. Fat doesn’t dry out — it goes rancid. So the leaner the cut, the longer your jerky will last.
Partially freeze the meat for 1-2 hours.
Slice into strips about 1/4 inch thick. Try to keep them as even as possible so they all dry at the same rate.
Step 2: Mix the Marinade
In a bowl (or directly in a zip-lock bag), combine:
- Soy sauce
- Worcestershire sauce
- Brown sugar
- Honey
- Smoked paprika
- Garlic powder
- Onion powder
- Black pepper
- Red pepper flakes (if using)
- Liquid smoke (if using)
Stir until the sugar dissolves.
Step 3: Marinate
Add your meat strips to the marinade, making sure every piece is coated.
Seal the bag or cover the bowl and refrigerate for at least 6 hours, ideally overnight (up to 24 hours).
Step 4: Prep for Drying
Take the strips out of the marinade and pat them very dry with paper towels.
Oven method: Preheat your oven to 175°F (80°C). Place strips on a wire rack over a foil-lined baking sheet. Leave space between each piece. Prop the oven door open slightly with a wooden spoon (this lets moisture escape).
Dehydrator method: Arrange strips on dehydrator trays. Set to 160°F (70°C).
Step 5: Dry It Out
Oven: 3-5 hours, flipping halfway through.
Dehydrator: 4-6 hours, checking periodically.
Jerky is done when it bends without breaking but doesn’t feel wet or soft. If it snaps completely in half, it’s overdried (still edible, just crumbly).
Step 6: Cool and Store
Let the jerky cool completely on the rack before storing.
This is the hardest step. Do not skip it. I learned this the way everyone learns things — by not listening and then wondering why there was moisture in my container.
Leftovers and Storage
| Storage Method | How Long It Lasts |
|---|---|
| Room temperature (airtight bag) | 1-2 weeks |
| Refrigerator | 1 month |
| Freezer | 6 months+ |
A few things that help it last longer:
- Make sure it’s fully dry before storing. Any residual moisture = mold risk.
- Use oxygen absorbers if you’re storing large batches for a while.
- Vacuum sealing makes it last significantly longer and keeps it from drying out further.
FAQ
Can I use a regular oven if I don’t have a dehydrator? Completely. A low oven with the door slightly propped open works very well. The dehydrator just gives you more control and is more energy-efficient for larger batches.
What’s the best cut of beef for jerky? Flank steak and top round are the most popular. They’re lean, slice cleanly, and have great flavor. Avoid anything with too much marbling — fat doesn’t dehydrate and will shorten your shelf life.
How do I know when it’s done? Pick up a strip and bend it. It should bend (like leather), crack slightly on the surface, but not snap in two. If it feels wet or soft, back in it goes. If it snaps apart, it’s overdried.
Is homemade jerky safe to eat? Yes, as long as your internal temperature reaches 160°F (71°C) during the drying process. Some people briefly heat strips in the oven at 275°F for 10 minutes right after marinating, before the low drying begins, to ensure safe temps are hit.
Can I make it spicier? Absolutely. Double the red pepper flakes, add a teaspoon of cayenne, or incorporate a tablespoon of hot sauce into the marinade. The heat concentrates as it dries, so it gets spicier than the raw marinade tastes.
Why is my jerky tough? Likely overdried, or sliced too thin. Aim for consistent 1/4-inch slices and check it at the 3-hour mark so you can pull it at the right time.
Can I make this with other proteins? Chicken and turkey work great. For chicken, slice thin and reduce drying time. Always make sure poultry reaches safe internal temps before the low-temp drying begins.
Wrapping Up
Once you’ve made your own beef jerky, you’re going to have a hard time going back to the store-bought stuff.
The flavor is just different — in the best way. You control the ingredients, the thickness, the spice level, and the texture. No preservatives, no mystery additives, and honestly no comparison.
It takes a bit of patience, but the actual hands-on time is minimal. Mix a marinade, let it sit overnight, pop it in the oven, and a few hours later you’ve got a batch that’ll disappear fast.
Give it a try this week and drop a comment below — I’d love to know how yours turned out, which flavor variation you went with, or any questions you have along the way. 👇