I used to think coconut milk only came in a can.
Then I spent a few weeks in Bali, and every single morning our host would blend up a fresh batch before breakfast. No can. No shelf-stable box. Just shredded coconut, water, and a blender.
I asked her why she didn’t just buy it at the store like everyone else. She looked at me like I’d asked why she doesn’t just buy sunshine.
That was the moment I realized homemade coconut milk isn’t some fussy, complicated kitchen project. It’s actually easier than driving to the store for a can of it. 🥥
And once you taste the difference, canned coconut milk starts to feel like drinking flat soda after you’ve had the real thing straight from the tap.
Side Note: If you’re into dairy-free swaps in general, you’ll probably also like my oat milk guide for another 5-minute homemade staple.
Why Make Coconut Milk From Scratch
Store-bought coconut milk usually has stabilizers, gums, and preservatives packed in to keep it shelf-stable for months.
Homemade coconut milk has exactly two ingredients. That’s it.
It’s also noticeably richer and fresher tasting, which makes a real difference in curries, smoothies, and baked goods where coconut is the star, not a background note.
And here’s the part that actually shocked me: a bag of dried, shredded coconut works just as well as fresh coconut meat, and it costs a fraction of the price per batch.
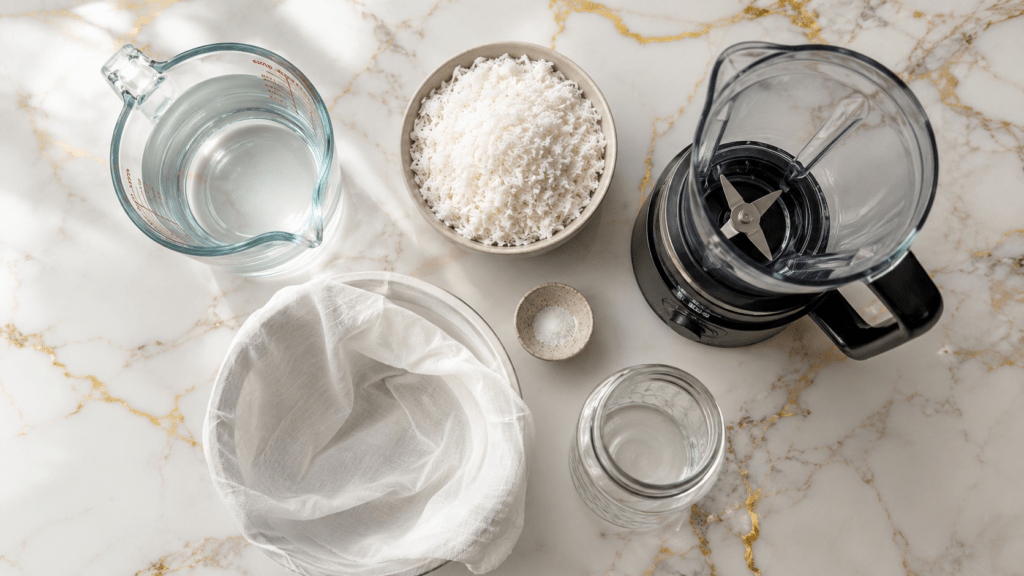
What You’ll Need
| Ingredient | Amount |
|---|---|
| Unsweetened shredded coconut (or fresh coconut meat) | 2 cups |
| Warm water | 3 cups |
| Pinch of salt (optional) | 1 pinch |
That’s genuinely the whole ingredient list. No fillers, no thickeners, no ten-syllable additives.
Tools You’ll Need
- High-speed blender
- Fine mesh strainer or nut milk bag
- Large bowl
- Airtight jar or bottle for storage
Pro Tips
Before we get into the steps, here are a few things I learned the hard way so you don’t have to.
- Use warm water, not boiling. Boiling water can make the coconut fat separate weirdly and leave you with a greasy film instead of smooth milk.
- Squeeze the bag like you mean it. A nut milk bag will get every last drop out, but you have to really wring it. A lazy squeeze leaves a surprising amount of milk behind.
- Save the leftover coconut pulp. It’s perfect stirred into oatmeal, baked into granola, or dried out and used like coconut flour.
- Shake before every use. Homemade coconut milk separates in the fridge. This is completely normal and just means it’s real.
- Blend longer than feels necessary. A full 60 seconds breaks the coconut down more thoroughly and gives you a creamier final milk.
How to Make Homemade Coconut Milk
- Add the shredded coconut and warm water to your blender.
- Blend on high for 60 seconds, until the mixture looks milky and slightly foamy on top.
- Set a strainer or nut milk bag over a large bowl.
- Pour the blended mixture through the strainer.
- Squeeze or press firmly to extract as much liquid as possible.
- Stir in a pinch of salt if using.
- Transfer to an airtight jar or bottle.
- Refrigerate and shake well before each use.
That’s the whole process. Ten minutes, two ingredients, one blender.
Substitutions and Variations
| Original | Swap | Why It Works |
|---|---|---|
| Shredded coconut | Fresh coconut meat | Slightly richer flavor, more work to prep |
| Warm water | Coconut water | Boosts coconut flavor even further |
| No sweetener | 1 date or 1 tsp maple syrup | Great for smoothies or coffee |
| Plain | 1/2 tsp vanilla extract | Nice for baking or cereal |
Want it thicker, closer to canned coconut milk? Use 2 cups of water instead of 3. Want it thin and light, more like a milk alternative for drinking? Use 4 cups.
Make Ahead Tips
Homemade coconut milk keeps in the fridge for about 4 to 5 days in a sealed jar.
You can also freeze it in ice cube trays, which is genuinely one of my favorite kitchen tricks. Pop a few cubes into curries, soups, or smoothies straight from frozen, no thawing required.
Nutritional Breakdown (Estimated)
Note: this is an estimate, not a lab-tested value, and will vary based on the ratio of coconut to water you use.
| Nutrient | Per 1 Cup |
|---|---|
| Calories | ~120 |
| Fat | 12g |
| Carbohydrates | 3g |
| Protein | 1g |
| Fiber | 2g |
Meal Pairing Suggestions
Homemade coconut milk is one of those ingredients that quietly shows up everywhere once you start making it regularly.
- Curries and soups: Thai curry, Moqueca-style stews, or lentil soup
- Smoothies: Mango, pineapple, or banana smoothies
- Coffee and tea: A splash in your morning coffee or chai
- Baking: Rice pudding, coconut cake, or overnight oats
Diet-Friendly Notes
This recipe is naturally vegan, dairy-free, gluten-free, and paleo-friendly as written, which makes it an easy staple to keep stocked for guests with different dietary needs.
Leftovers and Storage
Store your coconut milk in a sealed glass jar in the fridge for up to 5 days.
Give it a good shake before pouring since natural separation is expected, not a sign anything has gone wrong.
For longer storage, freeze it in ice cube trays for up to 3 months, then transfer the frozen cubes to a freezer bag once solid.
FAQ
Can I use sweetened shredded coconut? You can, but your milk will come out sweet, which works fine for smoothies but not so well for savory cooking like curries.
Why did my coconut milk turn out watery? This usually means the ratio leaned too heavy on water. Try 2 cups of coconut to 2 cups of water next time for a thicker result.
Does homemade coconut milk froth like store-bought? Not quite the same as canned full-fat coconut milk, since it lacks the added stabilizers, but it froths reasonably well for coffee if blended thoroughly.
Can I make this without a nut milk bag? Yes. A fine mesh strainer lined with cheesecloth works just as well, it just takes a little more squeezing.
Wrapping Up
Once you make coconut milk from scratch one time, it’s genuinely hard to go back to the can.
It takes less time than unloading your dishwasher, and you end up with something fresher, creamier, and free of any ingredients you can’t pronounce.
Give this one a try this week and let me know in the comments how yours turned out. I’d also love to hear what you end up using your first batch for. 🥥